How to Migrate Your WordPress Website
To start the migration process, add the domain you want to transfer to your hosting control panel.
Log in to your account and go to the «My WordPress Sites» section.
Click the «Create WordPress Site».
In the «Enter the domain name for the new site» field, input the domain you’re migrating. Make sure to omit prefixes such as www, http, or https.
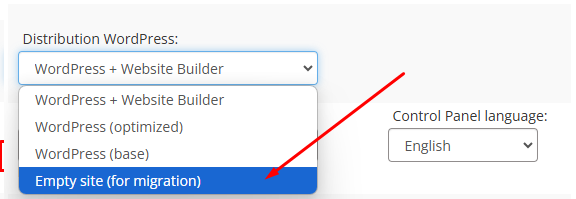
In the «Distribution WordPress» field, select «Empty Site (for migration)».
This option will create a domain account, including a database and an FTP user, to prepare your site for migration.
Click the «Create website».
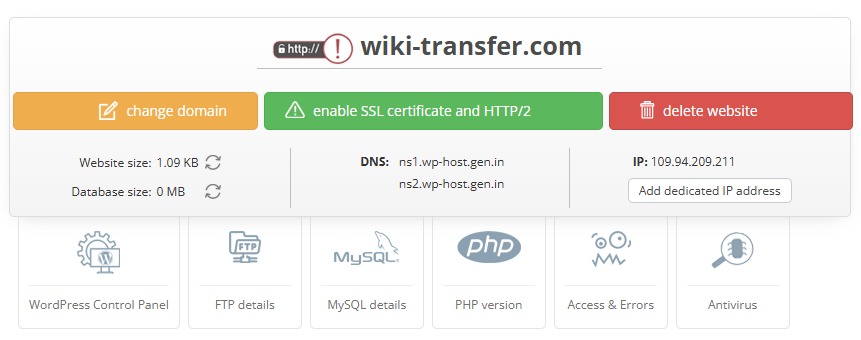
The domain has been successfully added to the control panel.
Now, upload your website files to the hosting server via FTP.
We recommend using FileZilla, a free and reliable FTP client.
You can download it from:
https://filezilla-project.org
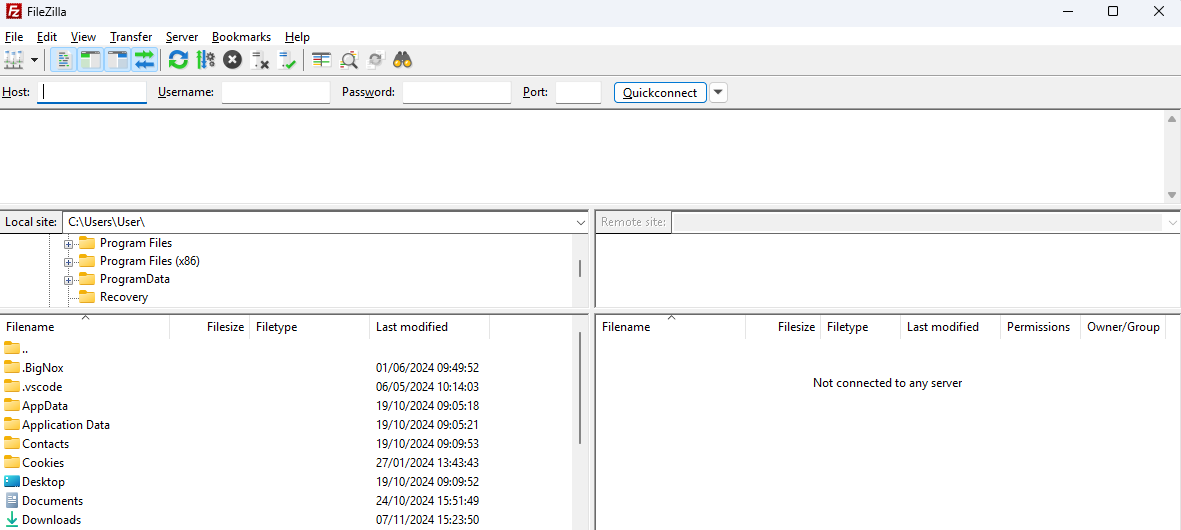
After downloading and installing FileZilla, open the program to begin the upload process.
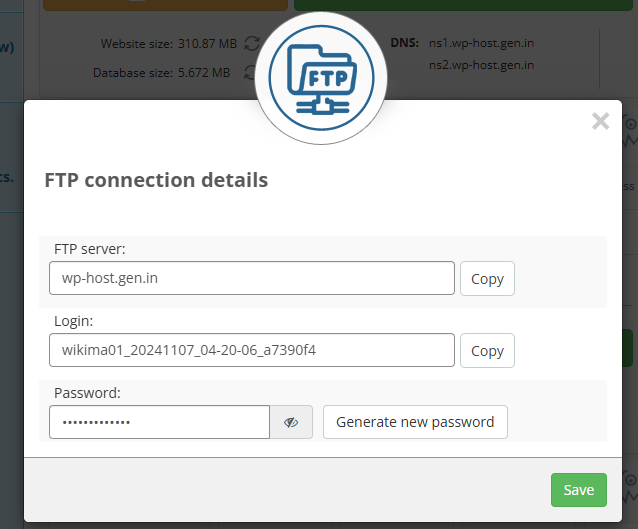
To connect via FTP, fill in the following fields:
- Host: Enter your server’s address (e.g., ftp.yourdomain.com or your server’s IP address).
- Username: Use the FTP username provided in your hosting account details.
- Password: Enter the password associated with your FTP account.
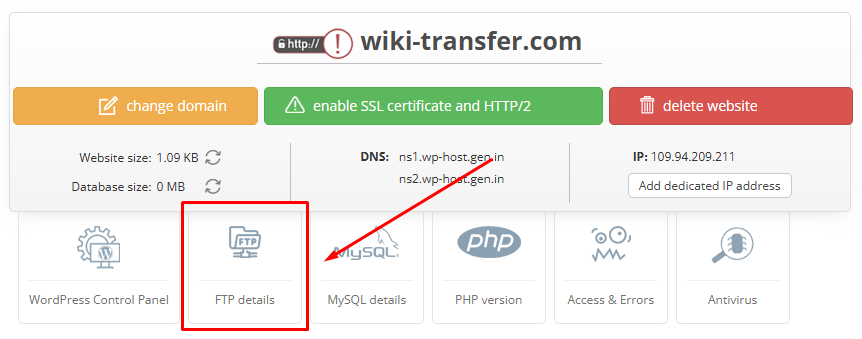
You can find your FTP connection details in your hosting account dashboard, under the settings for the added site.
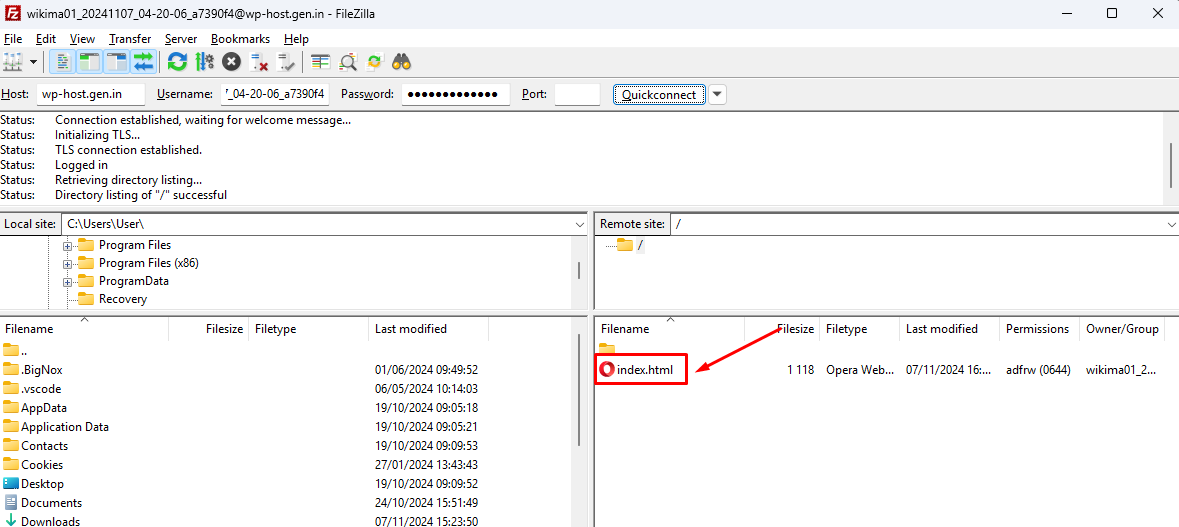
Enter the connection details in FileZilla's connection settings.
After connecting, navigate to the site’s folder and find the index.html file.
Delete it to avoid conflicts, then upload your website files to the server.
The next step is to import the database (DB) from your existing site.
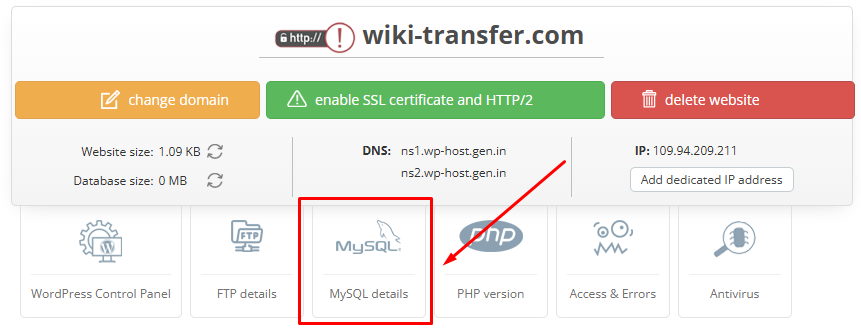
To do this, access phpMyAdmin via the «MySQL Details» tab in your hosting control panel.
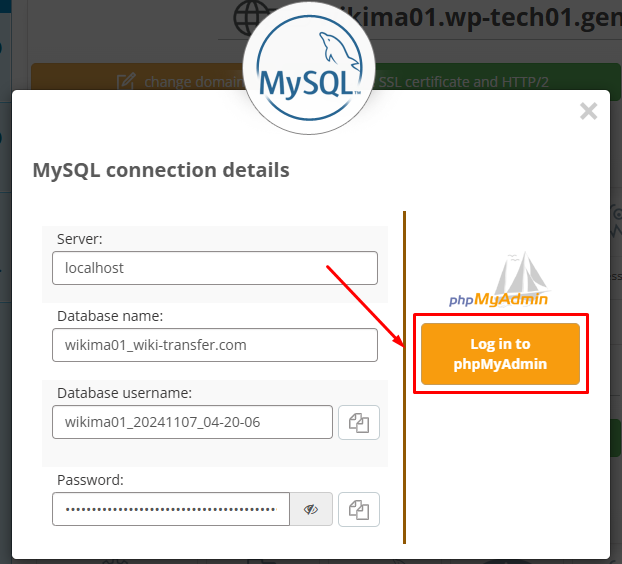
Click the «Log in to phpMyAdmin».
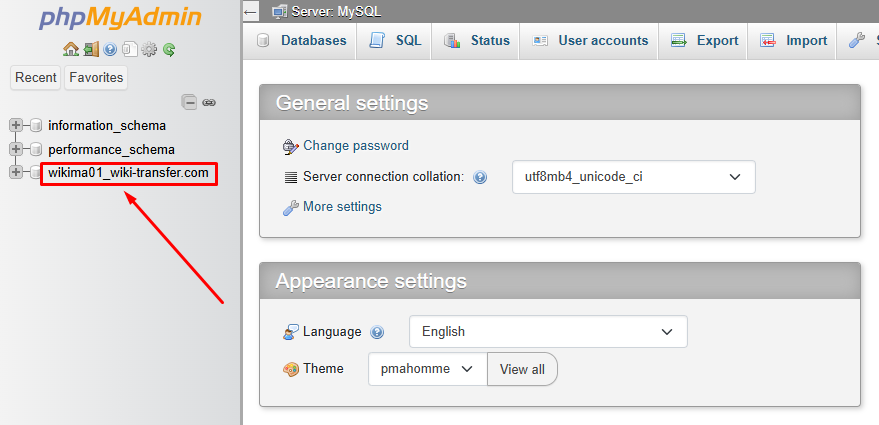
On the left-hand sidebar, select the database that matches your domain name.
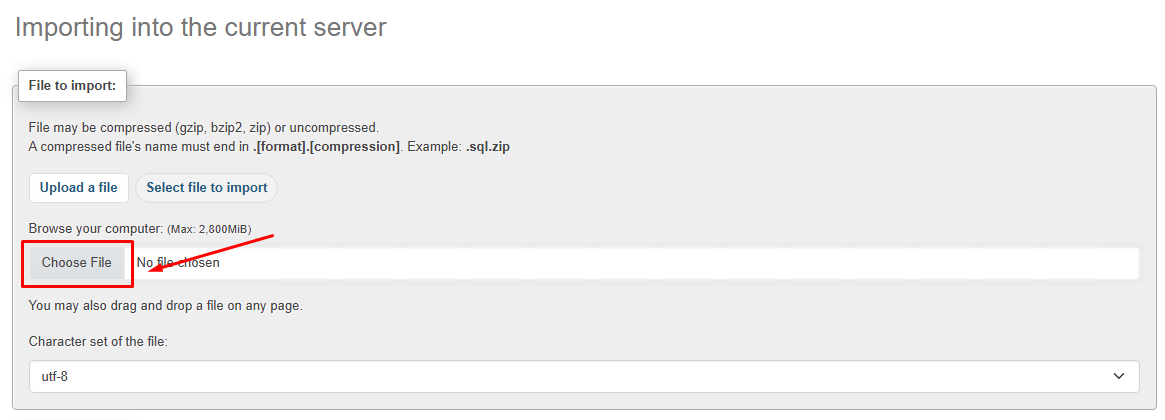
Go to the «Import» tab.
Click the «Choose File» button and select the database dump file you wish to import.
Click the «Import» button.
Your database has been successfully imported.
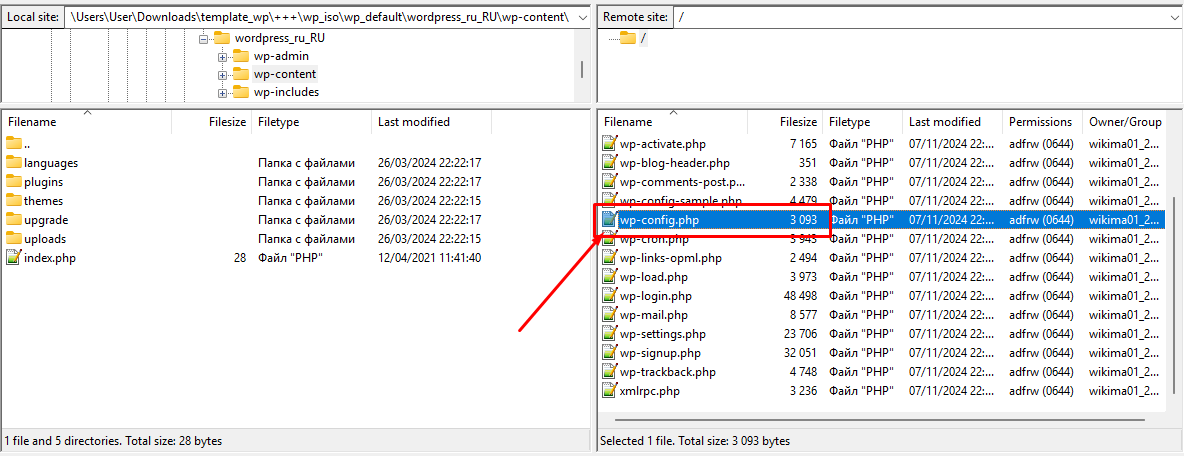
The final step is to modify the wp-config.php file, located in your website's root directory.
Open the wp-config.php file on your computer for editing. You can use the version you previously uploaded or download a fresh copy from the server.
Use any text editor, such as Notepad or Notepad++, to make the necessary changes.
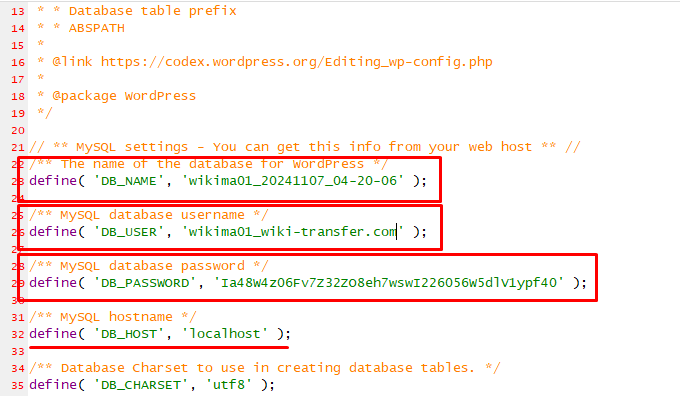
In this file, you’ll need to update the database connection details.
/** The name of the database for WordPress */
define( 'DB_NAME', 'your_database_name' );
/** MySQL database username */
define( 'DB_USER', 'your_database_username' );
/** MySQL database password */
define( 'DB_PASSWORD', 'your_database_password' );
Replace your_database_name, your_database_username, and your_database_password with the actual details provided by your hosting provider.
In the field:
/** MySQL hostname */
define( 'DB_HOST', 'localhost' );
The value should remain 'localhost', which is standard for most hosting setups.
However, if your previous hosting provider stored the database on a separate server, the DB_HOST field might contain a different address. In that case, update it to 'localhost' to match your new hosting environment.
Update the Database Name, Database Username, and Database Password fields in the wp-config.php file with the correct values.
You can find these details in the settings for your site in the hosting control panel.
Save the updated wp-config.php file and upload it to your website's root directory using your FTP client.
After completing the upload, refresh your website in a browser to ensure everything is working properly.


