Creating a New Database in ISPmanager
A database is essential for the operation of popular CMS-based websites such as WordPress, Joomla, OpenCart, and others.
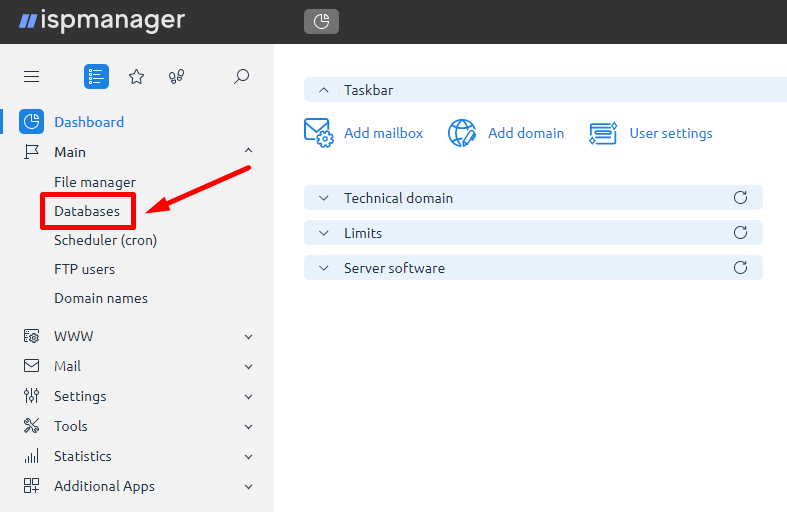
To create a new database, log in to the "Databases" section of your ISPmanager.
Click "Create Database".
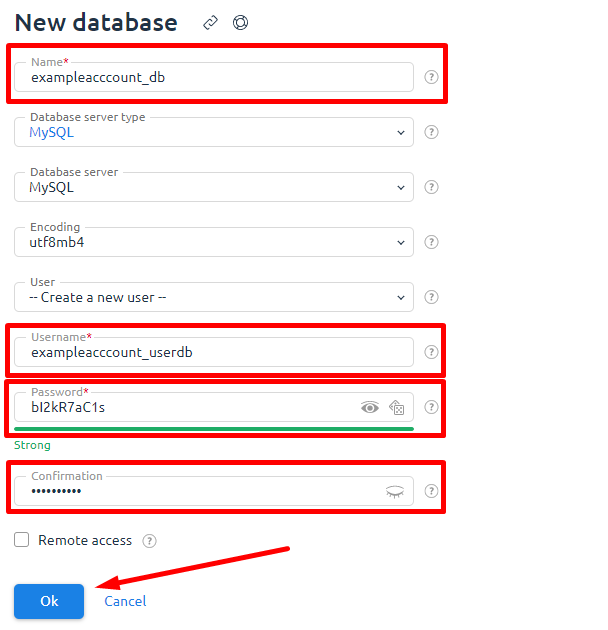
Fill in the data in the form:
"Name"
- Mandatory line. Enter a name for the new Database.
Combination: hosting account name_database name is best used. For example: exampleaccount_bd.
Combination: hosting account name_database name is best used. For example: exampleaccount_bd.
"Server type"
- leave by default.
"Database server"
- leave by default.
"Encoding"
- leave by default
"User"
- This menu prompts you to create a new user. You must select the same user for the new database if the user was created for an another database.
We recommend creating a separate new user for each database.
We recommend creating a separate new user for each database.
"Username"
- Mandatory line. Enter a new username for the database.
Combination: hosting account name_new user name is best used. For example: exampleaccount_userbd.
Combination: hosting account name_new user name is best used. For example: exampleaccount_userbd.
"Password"
- Mandatory line. The password must be entered twice in two fields to check the password for errors.
We recommend using uppercase, lowercase, special characters and numbers to enter your password. Use 8 characters minimum to improve database security.
We recommend using uppercase, lowercase, special characters and numbers to enter your password. Use 8 characters minimum to improve database security.
"Remote access"
- It allows you to enable remote access to a new or existing database. Use optional.
Confirm the entry of all data by clicking "Ok".
The database has been successfully created.
You need to select a new database and click "DB Web Interface" to go to phpMyAdmin.


