Creating Categories and Courses in Moodle
Let’s explore how to create courses and categories in Moodle.
To create and edit them, you need to be logged in as an administrator.
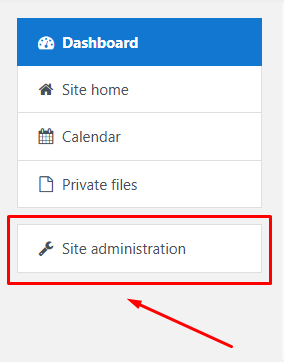
Navigate to the «Site administration» section.
Navigate to the «Courses» tab and select «Manage courses and categories».
To create a category, click «Create a new category».
In the «Parent Category» field, select either b>«Top» or an existing category.
If you choose an existing category, the new category will become a subcategory of the selected section.
Using the management icons, you can adjust the course’s position, hide it from users, or access the «Action Menu» icon to make edits or additional settings.
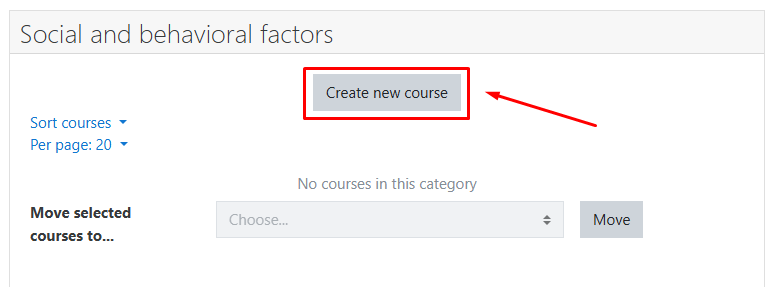
To create a new course, scroll down to the bottom of the page and click «Create New Course».
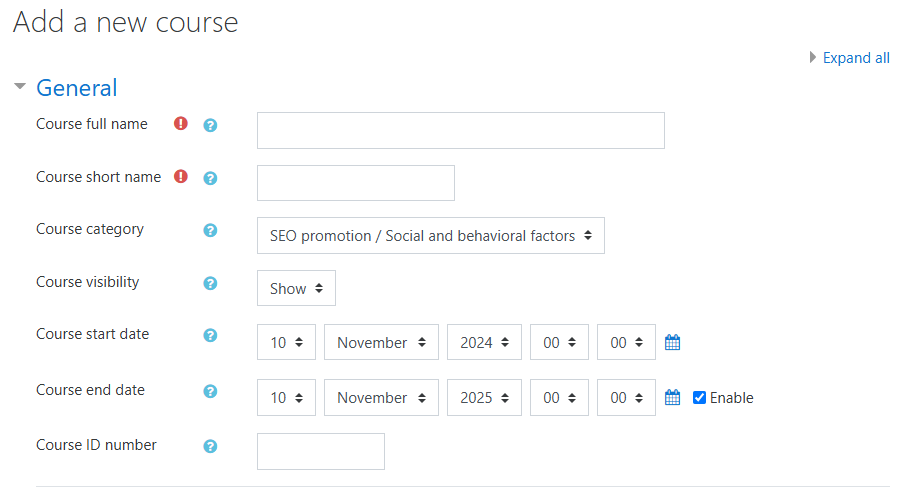
In the course creation form, fill out the fields step by step:
Complete the required fields to create a course:
- Full Course Name
- Short Course Name
The «Course Category» field lets you select the category where the course will be placed.
The «Course Visibility» field allows you to choose whether the course will be initially hidden or visible to users.
The «Course ID Number» field does not need to be filled out manually; it will be generated automatically.
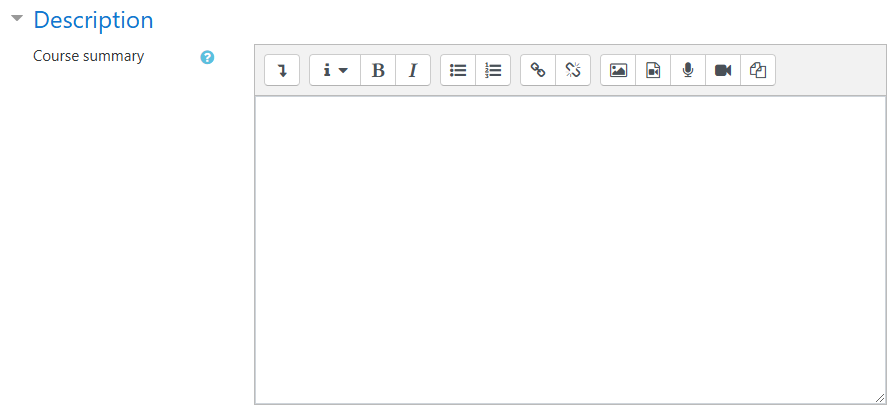
The «Course description» field allows you to add details about the course. Depending on the settings, this description might be displayed on the main page or accessed via a specific icon.
The «Course description files» field lets you attach files to the course description.
Below, you can access additional settings by clicking on their titles.
When you're finished, click «Save and Display».

